Results display
The essential
The Phraseanet Production interface is dedicated to viewing, searching, managing and editing documents, depending on the user rights. It as the default interface when connection for the first time.
Production Interface
Workspace
The workspace of Production is divided in 4 parts:
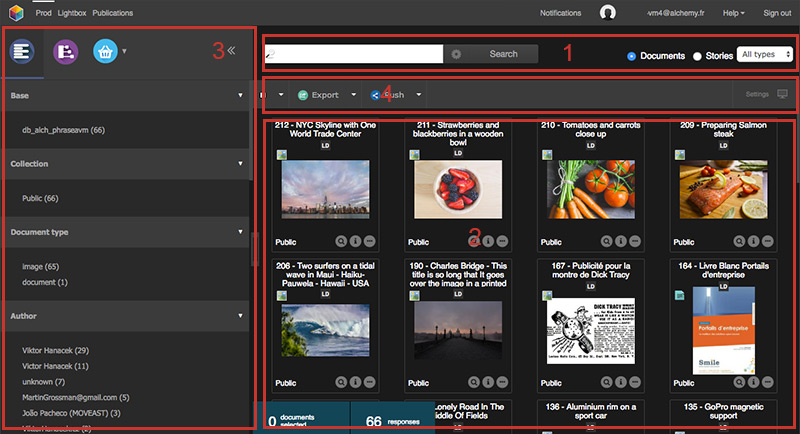
- 1. The search form allows to search media and stories
- 2. The display area displays the results of a search
- 3. The work zone regroups facets, thesaurus, baskets and stories tabs. It is minimizable.
- 4. The Actions palette allows to act on records. Refer to the dedicated page in Actions Palette.
A lower banner displays results number on the left side of the display area. When the bottom of the results page is reached, a pagination index appears on the right side. This index allows to move through the results.
To access a specific page, select and modify the colored background page number in pagination index then press Enter key on keyboard.

Search results presentation
The search results are presented as a grid or a list, depending on the users preferences. The thumbnails have a presentation title customizable by the Administrators.
Note
To customize the documents title displayed under the thumbnails, refer to the Administration section.
The name of the document’s collection is displayed in the bottom left corner: of the thumbnail. It can be replaces by a mini logo.

Mouse-over the thumbnail to display the document’s description. This description is made of non blank documentary fields filled by the assets manager. The terms used as search criteria are highlighted.
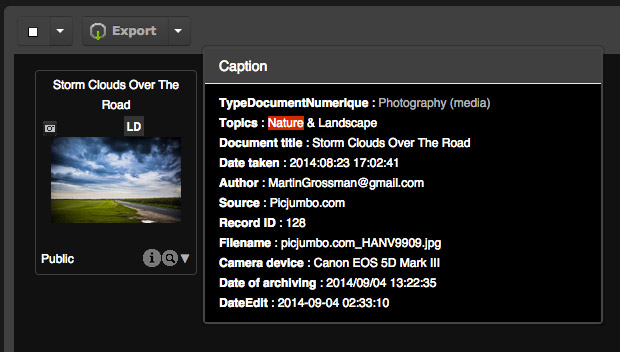
The “Magnifying Glass” allows to preview media. These previews are linked to the nature of the preview subview defined in the settings of the base that contains the displayed media.
By default, it is:
- A picture for image type documents
- A video extract for video type documents
- An audio extract for audio type documents
- A flash animation for some type of office documents
- A generic icon if the system does not recognize the file type or can’t generate any subview files.
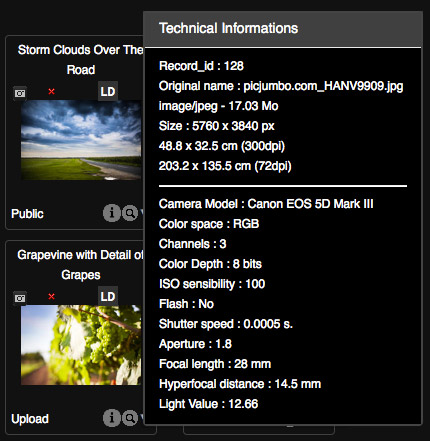
The “i” icon gives technical infos on the original document : width and height in pixels, type, weight, printing size... In fact, displayed information depend on media type.
Double click on the thumbnail of a displayed media for the detailed view.
The detailed view
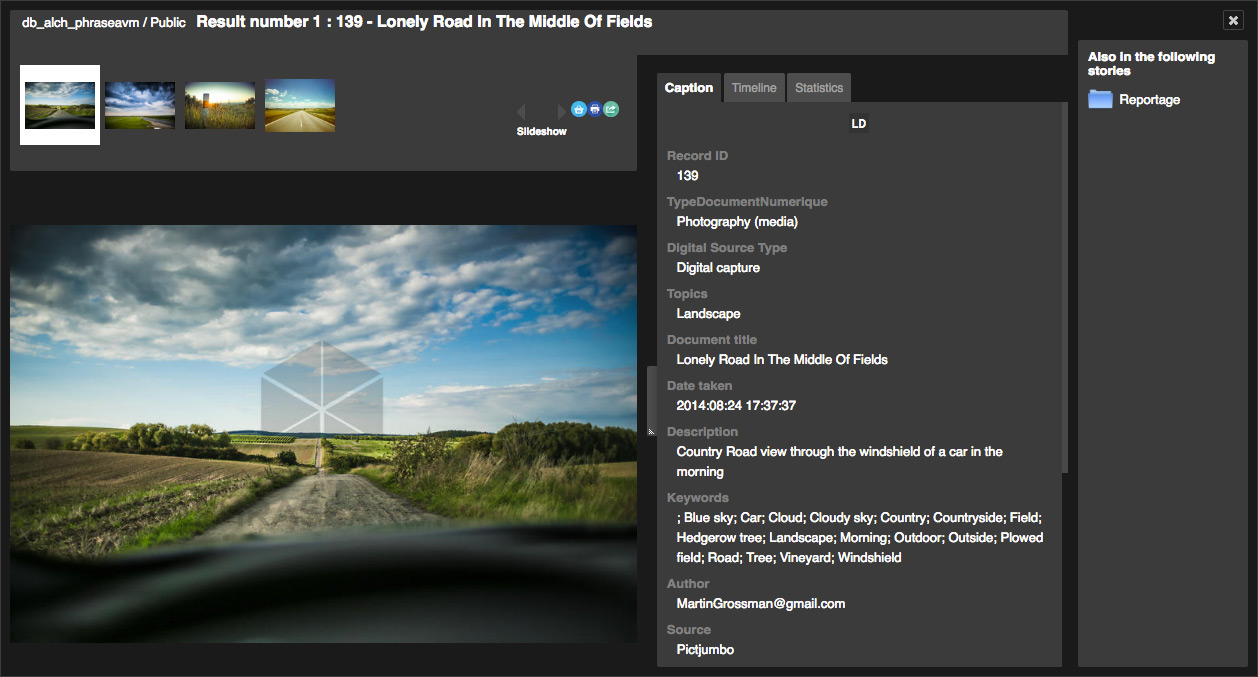
A detailed view displays a page’s documents list as browsable thumbnails:
- The upper part of the window displays the thumbnails feed which is browsable using the mouse or the keyboard from right to left.
- The preview image of the selected media is at the center.
- On the right side, three tabs display the description, the history and statistics on the displayed media.
- If the document belongs to baskets or stories, the information is displayed on the right side of the window.
Click on the preview image to display the media information or use the “left” and “right” arrows of the keyboard to browse.
Caption tab
This tab displays information from the filled documentary fields and technical details on the media.
Note
If a Thesaurus is linked to the base, some terms of the note may be clickable. They allow to bounce on other search queries.
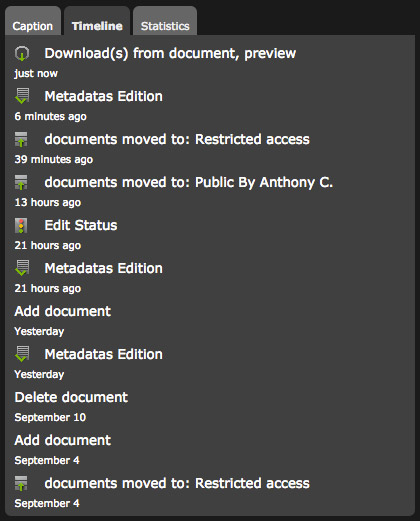
Timeline tab
This tab lists the history of all interactions made by users on the record since it was added to the Phraseanet base.
Statistics tab
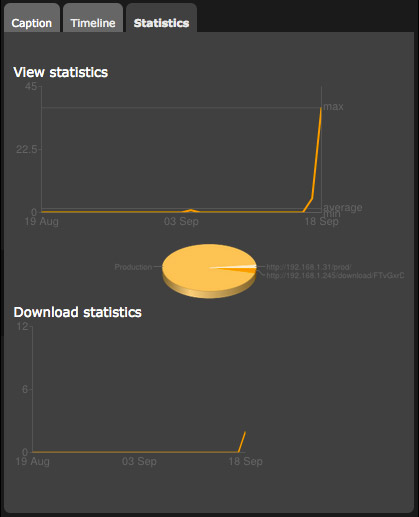
This tab displays statistics of the displayed media:
- Number of views
- Access source
- Download statistics
Note
For detailed statistics on a Phraseanet base, refer to the page dedicated to statistics.
Click on Close or use the Escape key of keyboard to close the window.
Records selection
Simple selection
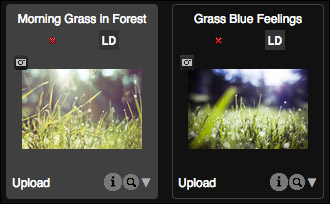
Select a thumbnail in the results area, in the baskets or in the stories by clicking on its frame. The background of the thumbnail changes color.
Note
This selection colour can be modified by each user in the Display Preferences.
Multiple selection
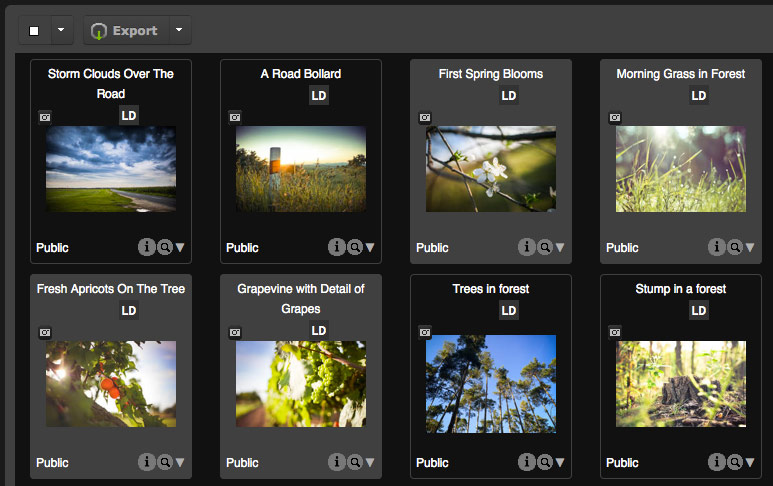
To select a continuous set of documents:
- Click on the first thumbnail of the series
- Press and maintain the Shift key of the keyboard
- Click on the last thumbnail of the series of records to select
All the thumbnails between these two thumbnails are selected.
To select several thumbnails in batch:
- Press on the Ctrl key of the keyboard for Windows PCs or Cmd key for MacOS computers
- Click consecutively on the thumbnails to select.
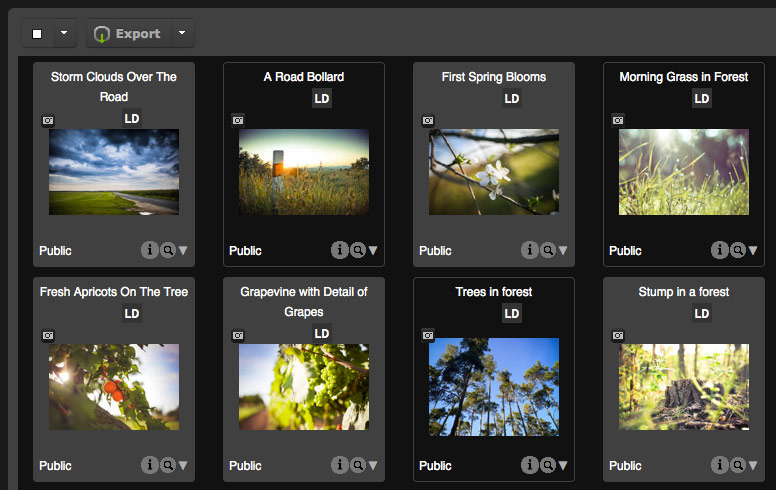
To select several thumbnails on several results pages:
- Select the thumbnails on the first page
- Click on the next page while pressing the Ctrl key of the keyboard for Windows PCs or Cmd key for MacOS computers
- Select thumbnails on the new results page
- Repeat the operation on other pages is necessary
The number of selected documents is displayed on the bottom left side of the display area.

Note
The number of records that can be selected is limited to 800.
Selection by media type
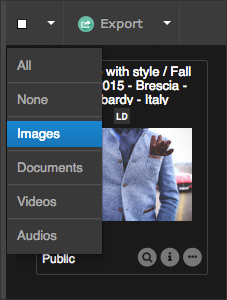
To select all the documents of a search depending on their type, click on the menu of the selection action (arrow on the right of the white square) then click on the type of document to select.
Selection basket
A selection basket is intended to regroup media in order to refer to them subsequently. A default basket exists and others can be created. Simple selections and multiple selections can be made on the documents of an opened basket.
Create a basket
- Click on the pop-up menu of the Basket / Story tab in the work zone
- Click on New basket
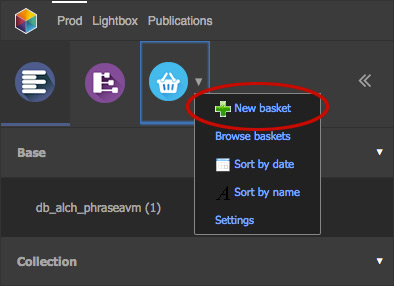
An overlay window displays a basket creation form.
- Enter a name for the new basket and a description (optional).
- Check the box Add to my current selection to add preselected documents in the results.
- Click on the Create button
Open or close a basket
To open and show the contents of a basket, click on its name. The basket is then active. Repeat the operation to close it.
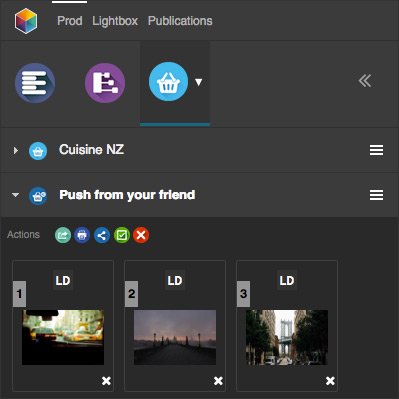
To show the contents of a closed basket, without opening it, place the cursor on the basket name. Its content is displayed in an overlay window.
Add media to a basket
From a selection in the display area
Using the mouse, drag-drop the selection of documents in the chosen basket of the work zone.
It is not necessary to drag a selection on an opened basket for it to be added to a basket. This action can also be made on closed baskets.
From the detailed view
Click on the “Basket” icon to add a displayed document to the active basket.
Display the content of a basket in the detailed view
To display the content of a basket in the detailed view, double click on one of the thumbnails of an active basket. The detailed view presents the content of the active basket.
Delete media from a basket
In an opened basket, click on the cross under the thumbnail of the document to delete from the basket.
Delete a basket
To delete a basket, click on the Delete section of the basket’s pop-up menu then confirm the deletion in the confirmation window.
See also
For more features, refer to the section dedicated to Baskets and Stories.
