Import
The essential
Relying on a HTML5 technology, the Upload interface is accessible in Production via a link located in Phraseanet menu bar.
Upload is an interface dedicated to media addition towards collections on which users have adding rights.
Note
For browsers that don’t have the full HTML5 support, a display mode relying on Adobe plug-in FlashPlayer is available.

Click on the link Use the Flash uploader to use this mode. This mode is a downgraded mode. It does not allow to access all the features developed with HTML5 technologies.
Add media
Click on the Upload link in the Phraseanet menu bar to prime the upload interface in an overlay window.
Select files
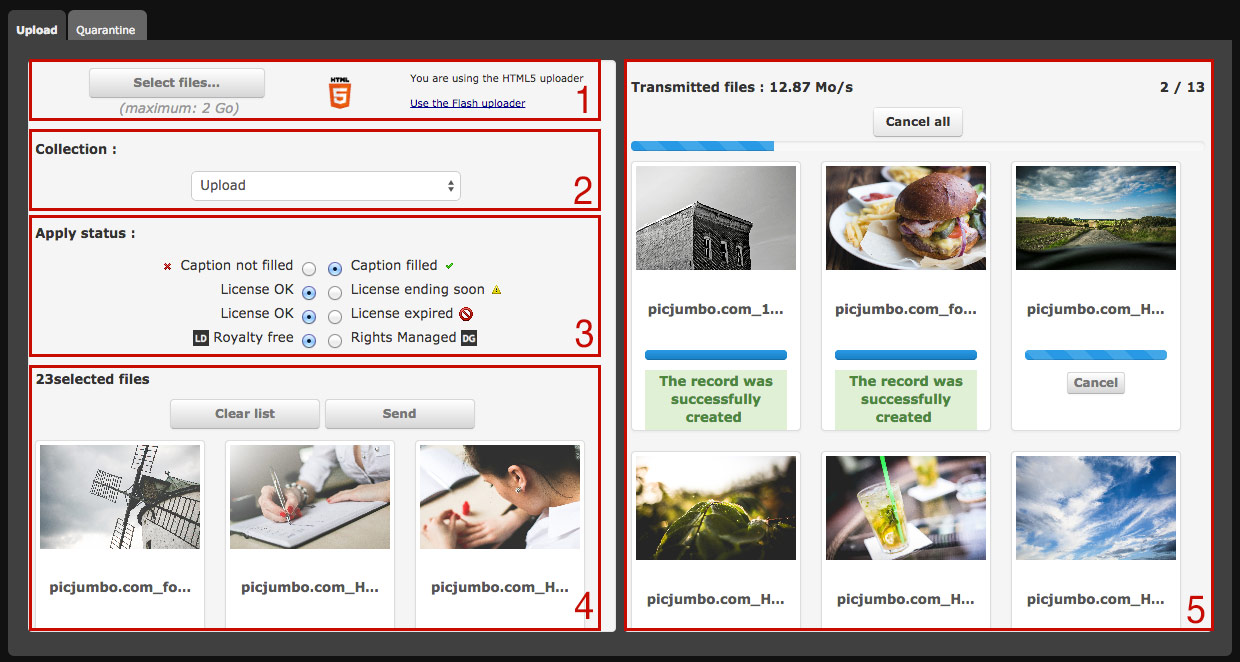
- Click on Select files (1). The file browser starts.
- Select the files to integrate by browsing through directories of your computer, then click on Open.
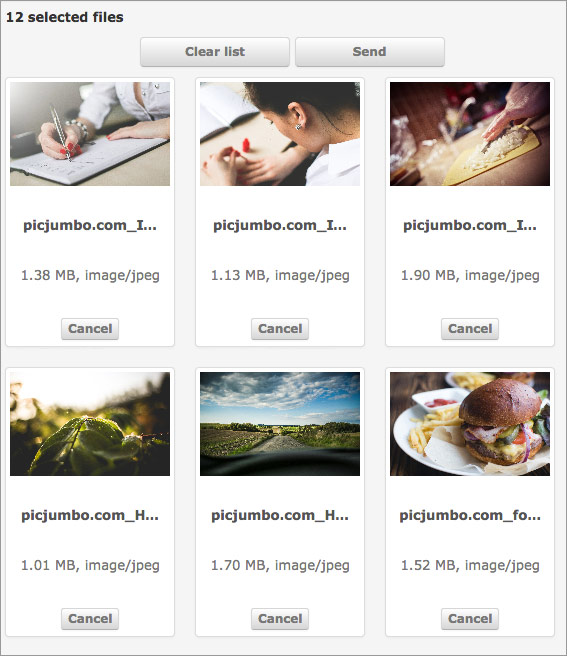
The selected files appear in the left side of the Upload interface (4).
Re-order, delete media from the import list
- Re-order media before importing them. Select a file and drag/drop it elsewhere in then grid.
- Delete from the list one or more media by clicking on Cancel below the thumbnails, or
- Reset the sending list by clicking on the Empty the list button.
Choose the collection of destination
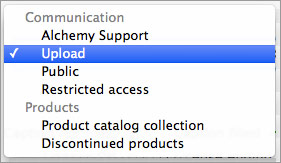
- Select the collection for destination in the drop-down menu (2).
Transmit the media
- Click on the Send button to import media in Phraseanet.
All the media are transferred in the selected collection. A progress bars indicate the state of the transfer in the Transmitted files section (5).
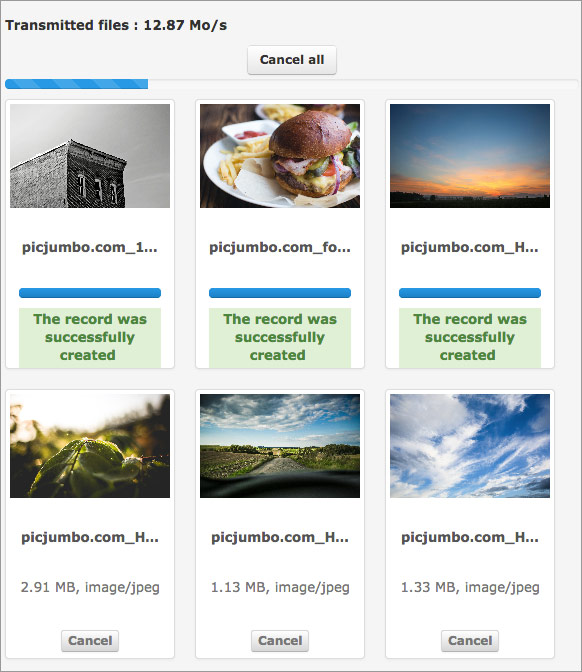
After transfer, media are viewable in Production and Classic interfaces.
Note
Other addition possibilities exist, like using a FTP directory. It consists in importing the files contained in a directory using an archiving task.
The quarantine
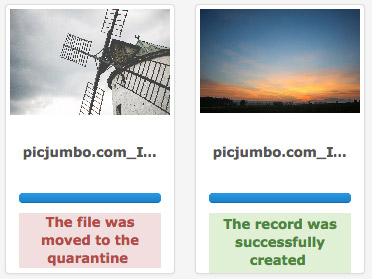
During import procedure, some files can be placed in Quarantine: they are notified by a red colour label and notifications can be sent by the system.
Note
By default, files that are already in the destination base are quarantined (achieved by Universally Unique Identifier checking).
Other criteria to quarantine files can be set by administrators (file format, color space, dimensions...*etc*.).
See also
For more information about the setting of additional criteria for quarantine, consult the dedicated paragraph at Custom services on this page.
Click on the Quarantine tab of the Upload window to display it contents.
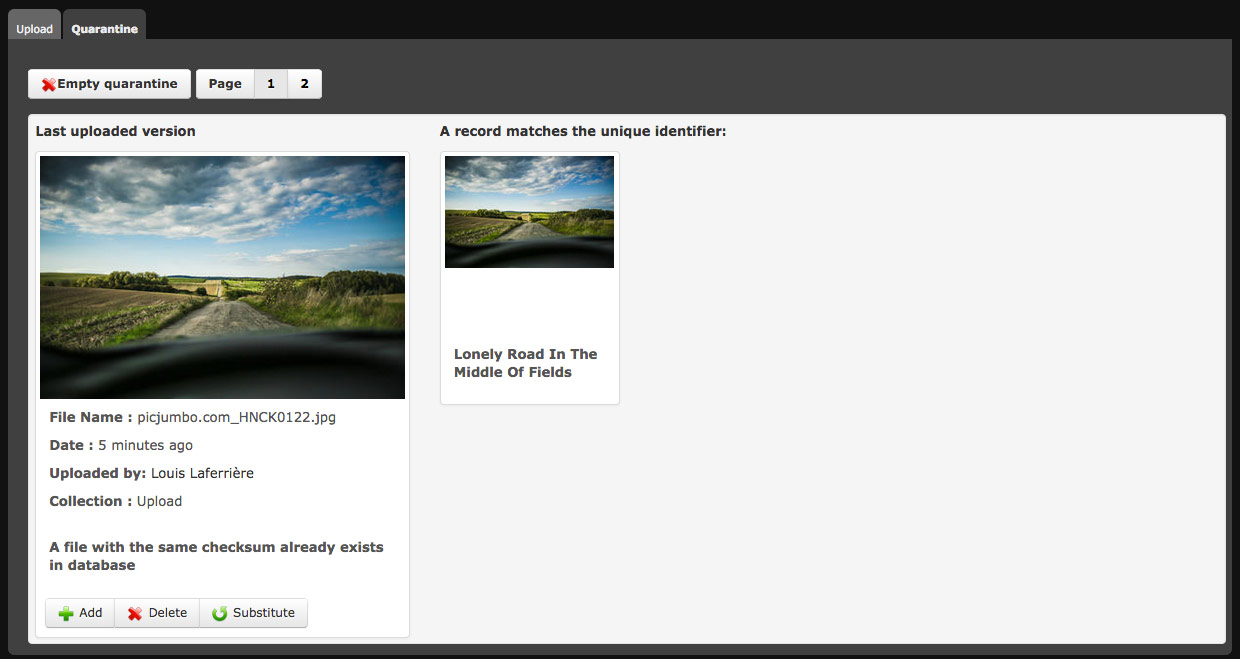
For each quarantined media, three options are possible:

- Add the file as a new record in the initially chosen collection
- Remove the file
- Substitute the existing file
The user decides what is the best option for files in quarantine.
The Quarantine can also be entirely deleted using the Empty quarantine button on the top left side of the window.

